Thursday, May 13, 2010

Beautiful, Hand-made Danish...just like Grandma's!


Okay, well, not my Grandma, but everyone I talk to says their grandmas made beautiful Danish. And it's so easy! Anyone can do it. The finished product is soft, sweet, and delicious.

First you have to make the dough.
Start this recipe by combining 1/4 c (2 oz) slightly warm water with 5 t (1/2 oz) active dry yeast. Set aside.

In the bowl of a standing mixer equipped with a paddle attachment, combine one stick (4 oz) unsalted butter,1/2 c + 1 T (4 oz) sugar, 1 1/2 t (1/4 oz) salt, and 1/2 c (1 oz) non-fat dry milk solids. Mix until well combined, but NOT until light and fluffy. Just give it a quick mix to make sure everything is evenly disbursed.

Then, add 2 large (3 oz) eggs in increments.
Add 3/4 c (6 oz) of water slowly. Mix briefly, just until the water is absorbed. The dough will be watery.
(And this, dear readers, is when my camera promptly died. So I'll make the dough again soon and take more pictures for you.)

Gradually add in the yeast mixture. It should have almost doubled in volume and be nice and bubbly. Now add in 2 3/4 c (1 lb) bread flour and 3/4 c (4 oz) cake flour. Don't worry if the flour doesn't absorb right away, it will. Once all the flour is absorbed, mix for 4 minutes on medium speed of your mixer. You will have a nice, smooth dough. Roll it into a ball and place it in a well-oiled bowl. Cover with a towel and place in a warm area for 1 1/2 hours.

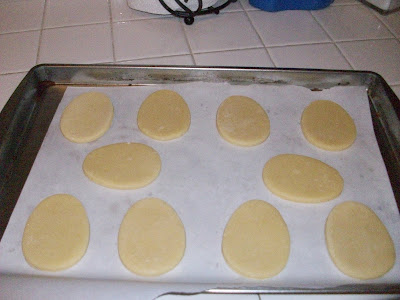
When the dough is ready roll it out on a well-floured surface. Now you can cut it into squares or strips and make Danish.

Wednesday, March 31, 2010

Yummy Butter Cookies

All bakers have their "go to" recipes. Those recipes they pull out because not only are the recipes tried and true, but delicious as well. I have several of these recipes, mostly from culinary school, and one of them is for butter cookies. These butter cookies are full of butter, just the right amount of sugar, and a hint of lemon. If you let them sit for a couple days after baking, they taste more like a traditional sugar cookies.

So these were the cookies I decided to make for Easter. And this handy, two-day division of labor will show you how to make the process less of a hassle.

Day One: The Making
First, measure out all the ingredients.


Soften the butter. Add in the sugar, salt, and lemon zest, and blend them together until light and fluffy. Like this:

Then scrape down the bowl, add in the eggs and blend the mixture. It looks broken, but that's okay. It's supposed to. See:
Scrape down the bowl again, and slowly add in the flour. Now it looks nice and fluffy again. See:

Scrape the dough out of the bowl, wrap it in plastic wrap, and flatten it into a disc.
Stick it in the fridge for at least 30 minutes, until it's chilled.

When you're ready roll out the dough to between 1/8" and 1/4" thick. Cut out your cookies. I'm doing eggs and rabbits. Place the cookies close together on a lined cookie sheet--Use tinfoil, plastic wrap, or parchment--and place in the freezer. Let the cookies freeze until they are hard, then you can carefully layer them in large ziploc bags. Or, wrap the cookie sheets to prevent freezer burn.


Day Two: The Baking
When you're ready to bake your cookies, pull them out of the freezer and arrange them on a parchment-lined sheet pan. I love to use parchment because not only does it help the cookies bake evenly, but it also simplifies the clean up. And with me, the less mess, the better! They won't spread a whole lot so you can place them 1"-2" apart.

Bake at 375 degrees for about 10 minutes The cookies will be done when they don't look wet, and edges have just a touch of color on them. Pull them from the oven and place them on a rack to cool.

While they are cooling, go ahead and make the icing.


Sift together 1 lb powdered sugar and 3 tablespoons meringue powder into a large bowl. Meringue powder can be purchased from any baking supply store, or even a Michael's craft store. Pour in 6 tablespoons of water. Using an electric mixer, or a standing mixer with a whip attachment, mix until stiff peaks form. If it's too dry, add more water until the right consistency is reached. If you want to color your icing, like I do, add a few drops of gel food coloring. I'm making a lot different colors, so I just put a little icing in each cup, and color them each a different color. Decorate as desired!

For a great way to decorate these cookies see this article from King Arthur Flour.

Wednesday, March 17, 2010

Warm and Delightful Blueberry Scones

These traditional scones come out of the oven with crunchy, golden brown tops and bursts of blueberry flavor.

So let's get baking!

This recipe goes very quickly, so it's best to get all your ingredients together first. You will need 2 1/2 cups self-rising flour (see note at bottom) plus extra for dusting, 1 teaspoon baking powder, a pinch of salt, 1 tablespoon sugar, 2 1/2 tablespoons cold butter, 1 cup milk plus a little extra, 1/2- 1 cup frozen blueberries, and some course sugar. (I forgot the blueberries in this picture, but you'll see plenty of them later!)

Sift together the flour, baking powder, salt and sugar. If you would like a sweeter scone add a little extra sugar. Cut the butter into cubes and add into the flour mixture.
Using just your fingertips, rub the butter into the flour until the mixture looks like course breadcrumbs.

Create a well in the center of the flour and pour in most, but not all of the milk.
Very quickly combine the flour and milk together. Try not to knead the dough, but continue to use just your fingertips.

When the dough just starts to come together, coat the blueberries in a little flour and add into the dough.
Continue to bring the dough together. If the dough is too dry, add a little more milk. Remember to work quickly as the blueberries have a tendency to bleed, the the more you work the dough, the tougher your scones will be.

Lightly flour a work surface and turn the dough out onto it. Pat the dough out to 3/4".
Using a round cutter, cut out scones and transfer to a baking sheet lined with parchment. (See all those blueberries?)

Brush the tops of scones with milk and sprinkle the tops with coarse sugar. Bake at 425 degrees for about 12 minutes, until golden brown on top.

Serve warm with whipped cream or butter. I like them with butter, but the whipped cream is more traditional. And look at those tops! The milk and sugar are what make them so golden and crunchy! Yum!

Note: If you don't have self-rising flour on hand, you can combine 2 teaspoons of baking powder with 1 cup of all-purpose flour and sift several times. this will give you just over 1 cup of self-rising flour. So for this recipe I measured out 3 cups flour and 2 tablespoons
(6 teaspoons) of baking powder. Then I sifted them together well and measured out the 2 1/2 cups I needed.

Tuesday, March 9, 2010

Doughnuts!

What else can wake up kids--even the kid inside you--like fresh doughnuts in the morning? Very little. These small, round doughnuts are covered in cinnamon sugar and have that wonderful taste that was only available in a doughnut shop!

First, combine one envelope (or one scant tablespoon) active dry yeast with 1/2 cup sugar, and one cup warm milk. Be sure the milk is just warm to the touch. If it is too hot, it will kill the yeast. Let sit until foamy.

Meanwhile, mix together 3 1/2 cups all-purpose flour with 1 1/4 teaspoons kosher salt in the bowl of a standing mixer. Set aside.

Crack and lightly beat 2 large eggs. Set aside.

Melt 3 tablespoons unsalted butter and then cool.

Add the milk mixture, eggs, and butter into the flour mixture. Fit the mixer with a dough hook attachment.

Beat on medium-low speed for about 3 minutes, until the dough is soft, but not sticky.
Take the dough out of the bowl and knead until smooth and elastic, 3-4 minutes.
This is the dough mixing away:
And here's the dough when it's finished. Remember: soft, but not sticky!
Spray a bowl with pan spray and place the dough in it.

Spray the top of the dough and cover with plastic wrap. (If you don't spray the top, the dough will most likely stick to the plastic wrap.) Let the dough rise in a warm, draft-free area for 1 1/2 hours.


Punch down the dough. Turn out the dough and knead a few times, then roll out to 1/4" thick. Make sure they are thin because they puff quite a bit when you fry them. Cover with a towel and let rest for 5 minutes. Then using a 2-inch round cookie cutter, cut circles from the dough. (You can use a smaller cutter, your doughnuts will just be smaller.) Transfer the rounds to a lightly floured surface. Cover with a towel and let rise for 20 minutes. Be sure they are in a warm, draft-free place.


Heat 3- 4 inches of oil in a skillet until it registers 375 degrees on a deep fry thermometer. (I used an electric skillet and filled it about 2/3 of the way full.) Line a tray with paper towels.

While the oil is heating, prepare a bowl of cinnamon sugar. Depending on your taste you will need 3-5 parts sugar to 1 part cinnamon. And you probably won't need more than 1- 1 1/2 cups of cinnamon-sugar.

Working in small batches, fry the doughnuts until golden brown. Flip once during frying. Once golden brown on both sides, remove from oil using a slotted spoon. Remove any excess oil by placing on a paper towel, then carefully roll in the cinnamon sugar.


Viola! Doughnuts! Enjoy!

Mmmmmmm!

Instead of rolling in cinnamon sugar, try rolling in plain granulated sugar, cool completely. Fill a ziploc bag partway with raspberry or strawberry jam; squeeze the air out and zip shut. Snip a corner of the bag with scissors. Poke a hole to the middle of each doughnut with a knife. Squeeze a small amount of jam into the center of each doughnut. Mmmm...